Confused about contouring? Tips + Essentials you need to know!

For the past couple of years, contouring has been a makeup trend that everybody cannot stop talking about. You see those crazy before and after pictures of beauty gurus showing their face before applying makeup, with the makeup on but now blended (which always totally looks like clown makeup!), and then looking totally gorgeous, but somehow different than their natural face, once they have blended and finished their look. But does contouring only work when you take it to the extreme? No!
Contouring is meant to enhance your facial structure through makeup, but can absolutely be done in a subtle, natural way. It uses highlighting and definition to accent your natural facial features and give more shape to your face. We’ve broken it down to the basics, and are sharing our tips and essentials for a naturally contoured look!
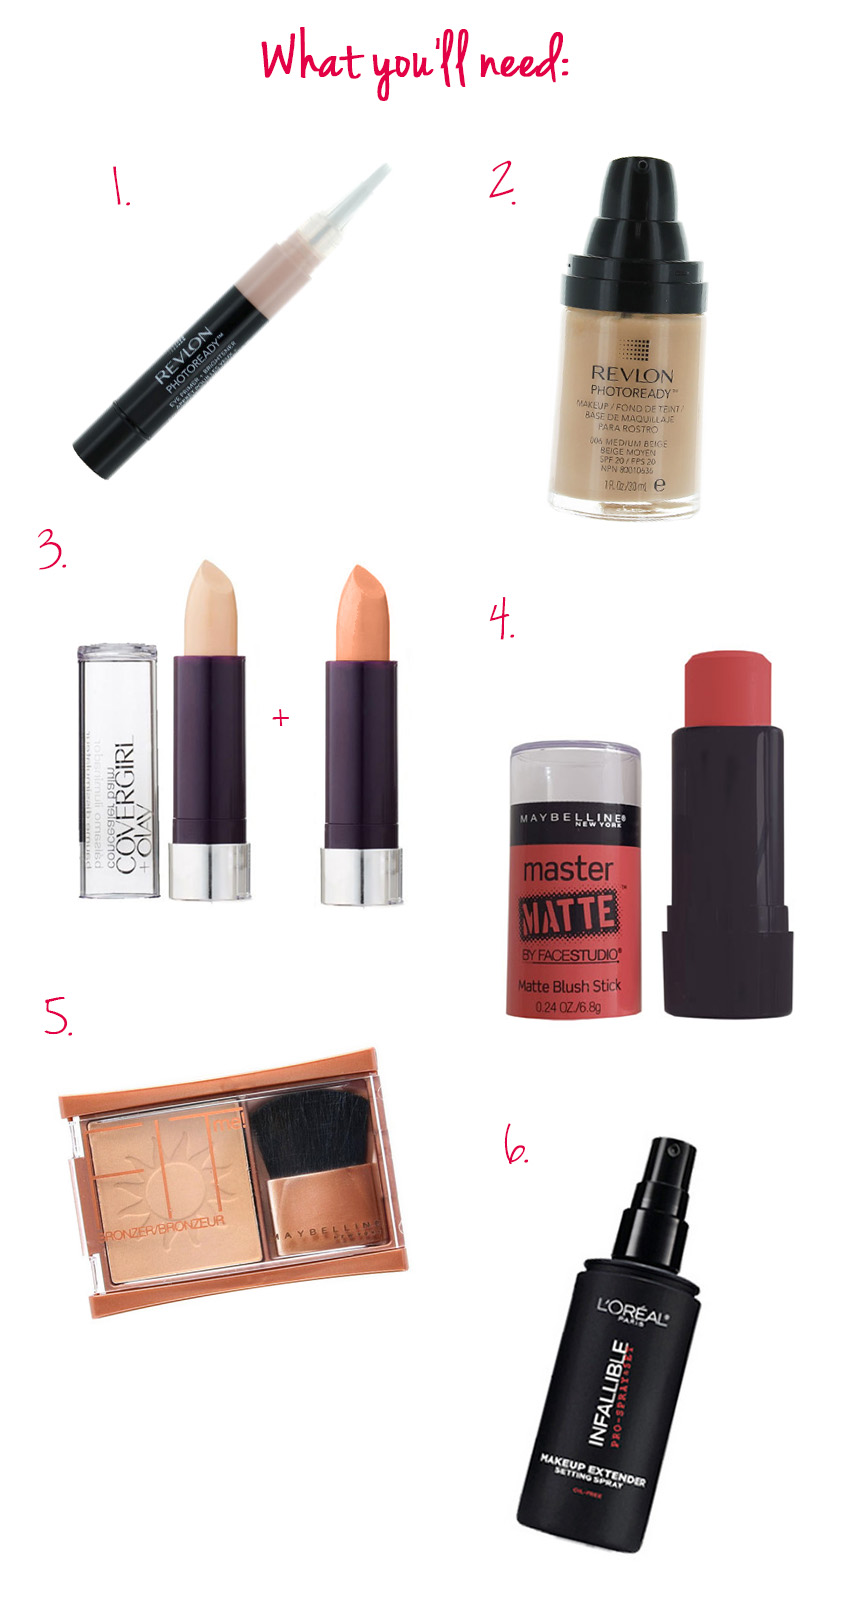
1. Eye Brightener
When you’re contouring your face and making the effort to bring out its shape and accentuate your features, you don’t want to forget to brighten your eyes. You need to cover any dark circles and illuminate your eye area to make sure that they don’t get overpowered in the rest of your makeup look. The Revlon PhotoReady Eye Primer & Brightener is lightweight enough so that can give undetectable coverage underneath your foundation while brightening your skin and neutralizing any redness or purple under eye or eyelid discoloration.
2. Blendable, high-coverage foundation
Because you are working with so many different products in different facial areas to help define your face, you want to make sure that the base of everything - your foundation- is easily blend able but yet won’t overpower any highlighting/contouring you do. For this, we recommend the Revlon PhotoReady Makeup because it gives full coverage within a lightweight formula that looks seamless. It also has special photo chromatic pigments that bend and reflect light to give you a soft, luminous finish, which is exactly what we want in a contoured look.
3. A great concealer
You’re going to need 2 shades: one that is 2 shades lighter than your skin tone that will be used as a highlighter, and one that is 2 shades darker than your skin tone that will be used for contouring. It’s important to invest in a good concealer that really gives the right amount of coverage - not to thin, but also not heavily cakey. We recommend the Cover Girl & Olay Concealer Balm because it is very easy to use for contouring with its smooth formula + easy glide-on application, and it also can even out any skin imperfections/discoloration.
4. A blush stick
With contouring, a blush stick makes it much easier to achieve the look you want than with just a powder blush. A creamy stick formula also makes it easier to achieve a richer color than with a powder, so try the Maybelline Face Studio Master Matte Blush Stick. This one is great because it’s highly pigmented but also is so easy to blend out with the rest of your makeup. It also has a matte finish so it will give you a flush of color without detracting from your overall look.
5. Powder bronzer
Although we want a creamy stick for the blush, we want to do the opposite for bronzer and go for a powder. When you’re contouring, you’re going to keep your bronzer use to a minimum because you are already getting definition with the contouring. We use the Maybelline Fit Me Bronzer to use as a complement to our blush and to give a lightweight, blend able touch of bronze to specific areas.
6. Setting Spray
This one can probably be one of the most important products you’re going to need, because after you spend all that time and effort creating a contoured look, you do NOT want it to fade or melt after only a couple of hours. The Loreal Infallible Pro-Spray & Set Makeup Extender Setting Spray uses a lightweight, oil-free liquid spray to lock in your makeup all day and keep it from smudging, fading, or melting, even in the humidity.
Ok, so now that you have everything you need, what are you supposed to do with them?! It’s not as hard as it may seem, so let’s get right into it!
First, take your eye brightener and apply it underneath your eyes, on your eyelid, and up to your brow bone and blend it into your skin.
Second, you are going to apply your foundation as you normally would all over your face and down your neck.
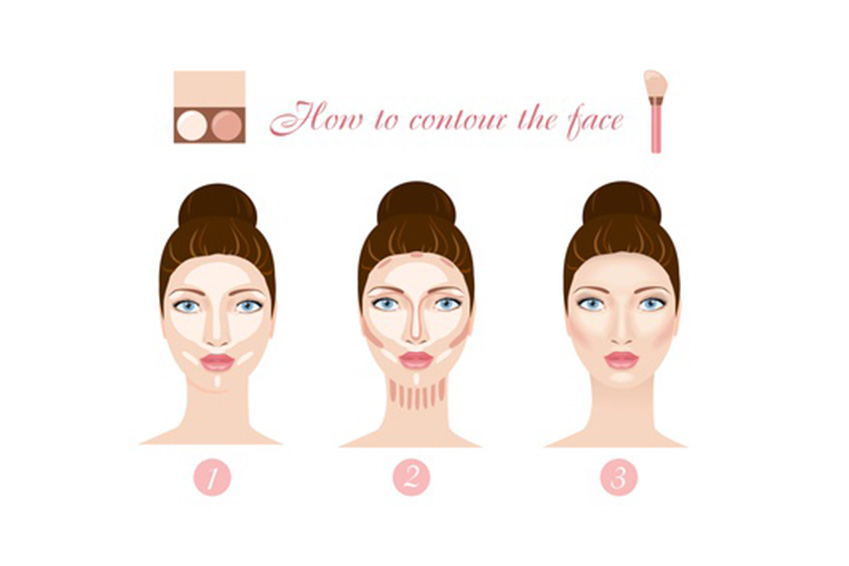
Next, you are going to use your highlighting concealer and apply it to the areas of your face you want to highlight (feature). This would be the bridge of your nose, along the sides of your forehead, 3 lines around your mouth (your chin and two mirrored lines on either side of your lips), and a fan shape on the middle of your forehead.
After highlighting, use your contouring concealer to define the opposite areas of those you highlighted, which would be the sides of your nose, around the top of your forehead, the natural shape of your cheekbone, and also in vertical lines along your neck to help create a more natural transitional appearance.
Now, you are going to carefully blend your whole look with soft strokes using a buffing brush.
After you’ve blended your concealer with your foundation, apply the blush stick in a line that follows your cheek bone structure, and blend it out.
Then, take your powder bronzer and lightly apply it on top of that same area to give more definition.
Now that you’ve finished your look, take your setting spray, shake it, hold it about 8 to 10 inches from your face, close your eyes, and spray it about 4 times in an ‘X’ formation to lock in your look.
And there you have it! We hope these tips and essentials will help you to create a natural contoured look! Do you have any tips for contouring? Let us know!
Recent Posts
-
Masque Bar: Mud Wash & Peel Off Mask
Skincare — buymebeauty.com Masque Bar:Mud Wash & Peel Off Mask Skincare can feel overwhelming — b
-
Maybelline Lifter Gloss: Find Your Shade Before It's Gone
Summer Beauty — buymebeauty.com Maybelline Lifter Gloss:Your summer lips start here Summer is fin